

Complete Guide to Heat Exchanger Shell Welding for Industrial Applications
A heat exchanger shell may sound complicated, but you can think of it as a container that holds everything while the different fluids inside conduct heat. However, things get serious when this container has to withstand high pressures, heat, and other operational factors for a long period of time. If done wrongly, shell welding can have serious risks.
You can easily spot tank welding processes being used in oil & gas, chemical processing, and power generation industries. Hence, you must know the techniques of shell welding. This guide will help you learn about the challenges you are likely to face and how to overcome them.
What Is Heat Exchanger Shell Welding?
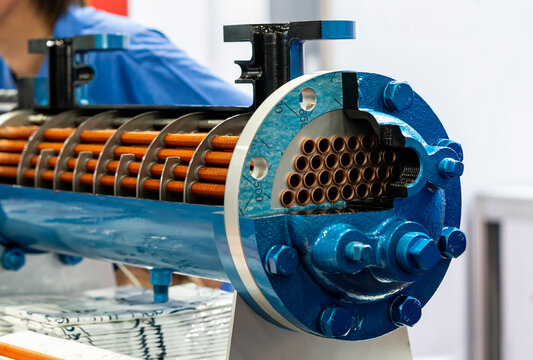
A heat exchanger shell is an exterior component that holds all the parts together. The fluids inside the shell move and exchange heat. With the help of a shell, you can keep everything contained. You can spot heat exchanger shells in the oil and gas and power generation industries.
Additionally, these shells are pressure vessels. This means they hold pressurized fluids. These can be dangerous if something goes wrong. The pressure will add to the risk, and it can create a big issue for you to deal with. That’s why you need to be extra careful while welding.
So, no, pressure vessel welding is not “simple welding.” It isn’t just putting two metals together to join them. It is about creating the weld joint to contain heat, pressure, and long-term loads without failure. This technique allows you to build a weld that will not fail. However, you must remember that even a small imperfection can result in leaks or cracks.
To help you avoid the consequences of such mistakes, there are established codes and standards. They tell you what types of materials to use, how to weld, how to inspect, and how to test the weld after it is done. You must follow them closely to ensure the best results.
Common Welding Methods for Heat Exchanger Shells

If you think welding heat exchanger shells is a one-size-fits-all method, you might be wrong. You need to approach each task differently based on specifics such as the thickness of the material, the location, and the specifications needed. Below is a simplified overview of the most common ones.
1. SMAW (Stick Welding)
SMAW (Stick Welding) is a fast and simple welding style that works well with on-site and repair work. It is not very equipment reliant, as some welding methods, and is very reliable in almost all conditions. Because of wind protection and other simple factors, it is very common, even today. However, you might have issues with this method being very slow and demanding a lot of welding skill.
2. GMAW (MIG Welding)
GMAW (MIG Welding), or in other words, gas metal arc welding, is the opposite of stick welding in almost all aspects. This method is much faster and very suited for industrial environments. With this method, you can enhance your productivity.
These welds are so much cleaner than those of SMAW welds. However, you can’t opt for this method when dealing with thicker welds and outdoor areas. This is because the shielding gas is affected by wind, which can cause defects.
3. GTAW (TIG Welding)
GTAW (TIG Welding) focuses on a high level of accuracy. If you want high-quality and clean welds, this is the method. It is also used for root passes, the first layer of the weld, which is the most important. Control over this method is great, but it is extremely slow and more expensive. It also requires you to have more skill and patience.
4. SAW (Submerged Arc Welding)
For heavy-duty work, you cannot go wrong with SAW (Submerged Arc Welding). Imagine working with thick plates and long, straight welds. It is extremely efficient in helping you achieve welds that are deep, strong, and consistent.
Because the arc is submerged, it reduces spatter and increases quality. The only downside you might face is that you can only use it in a flat or horizontal position. For this, you will need special equipment. So, how do you pick a method?
It is simple. If there is work that needs to be done out in the field, then stick welding is the more practical way to go. If you are looking for speed in a controlled shop, then MIG is suitable. When it comes to precision and critical joints, there are few methods better than TIG.
SAW is almost always a better option for large-scale production involving thick materials. In real projects, you will often see a combination of methods being utilised. Hence, your focus should be on selecting the correct method to use at the correct time.
| Method | Best Use | Advantages | Limitations |
|---|---|---|---|
| SMAW | Field, repairs | Portable, wind-resistant | Slow, skill-heavy |
| GMAW | Shop, production | Fast, clean, efficient | Wind-sensitive, limited thickness |
| GTAW | Precision, root pass | High quality, precise | Slow, costly |
| SAW | Thick plates, long seams | Deep welds, high output | Flat position only, setup needed |
How to Weld a Heat Exchanger Shell
Let’s break this down and show you how the welding process works for each step.
1. Material Preparation
Everything starts here. First, clean the metal. No oil, rust, or dirt. Even the smallest contamination can cause defects. Next, you want to bevel the edges. This creates space for the weld, for it to fully penetrate. If you skip this step, the weld won’t be strong enough.
2. Fit-up and Alignment
This is where many problems begin. Position the shell sections and make sure everything is even. If the gaps are uneven, then the edges won’t match. Alignment is everything. If you don’t align well, then fixing it later will be difficult.
3. Tack welding and Setup
For the final step, you want to add tack welds. This will hold everything together for the next process. Think of these as temporary anchors when you are applying heat. You must double-check alignment here, as adjustments won’t be possible after this.
4. Primary Welding Passes
This is where the real work starts. You start with the root pass. This needs to be clean and solid, since it is the foundation of the weld. Then come the fill passes, where you build up the joint. Finally, with the cap pass, you give the weld its final shape and surface. Each tier is crucial.
5. Managing Heat Input and Distortion
Heat can be both a tool and an enemy. It can have detrimental effects if you fail to manage it properly. Too low heat can weaken the weld, and too much can warp the shell. You have to control the temperature, the speed of the weld, and the order of your passes. In certain cases, you will weld in stages or switch sides to help manage distortion.
6. Checkpoint Inspections
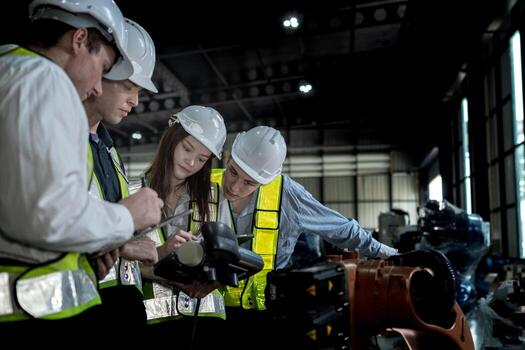
You shouldn’t wait until the end to check the quality of the weld. Visual inspections can occur at any point during the process. To check critical work, you may have to employ non-destructive testing. Issues that have been caught earlier will always save your work and help you avoid problems.
Essential Equipment for Heat Exchanger Shell Welding
If you want to do this job accurately, you need more than just skills. The right tools can improve quality, save time, and help you reduce errors.
1. Welding Machines (Based on Method)

The first thing you need to do is begin with a welding machine. Which machine you bring depends on the method you are using. Stick welding is the most common method for on-site jobs and repairs.
In the case of heavy-duty construction work with thick and long plates, you would require a submerged arc setup. Each welding machine is designed for a different function. Hence, the type of job being undertaken determines which welding machine is the most suitable for you.
2. Positioners and Rotators

If you are welding large structures, then these tools are a game-changer. Instead of you having to walk around the shell, the machine does the work of rotating it. This allows you to position the weld in a better position, which is typically flat. Overall, the task is faster and easier. It can help reduce the physical effort required from the welder.
3. Clamping and Alignment Tools
These tools are utilized in the setup stage. They ensure that your parts are secure and aligned. Proper alignment is crucial. Even if you make small mistakes in this phase, it can lead to critical mistakes in the future. Therefore, doing this correctly can save you a lot of time and rework.
4. Preheating Equipment
Preheating is a critical step essential for thick materials and certain metal types. By preheating thick metals, you can warm the metal before welding. This helps reduce cracking while enhancing the weld strength.
Preheating also controls the heated area’s cooling rate after the welding procedure. The importance of this step is evident from the fact that it is a requirement in many industrial jobs.
5. Inspection Tools (NDT Basics)
Welding is more than just joining metals. A crucial part is checking weld quality. Your weld inspection begins with a visual inspection. For more critical jobs, the inspection is done with non-destructive methods, such as ultrasonic testing (UT) and radiographic testing (RT). These methods find defects in your weld, leaving the weld intact.
| Equipment | Purpose | Impact on Welding |
|---|---|---|
| Welding Machines | Perform welding based on method (SMAW, MIG, TIG, SAW) | Determines weld quality and efficiency |
| Positioners & Rotators | Rotate shell for better weld positioning | Improves speed, consistency, and ergonomics |
| Clamping Tools | Hold and align components | Prevents misalignment and rework |
| Preheating Equipment | Heat material before welding | Reduces cracking and improves strength |
| Inspection Tools (UT, RT) | Detect internal defects | Ensures weld reliability without damage |
Key Challenges in Heat Exchanger Shell Welding
Now, this part of the manufacturing is difficult. Welding heat exchanger shells poses real challenges, even for those with years of experience. Here are some of the major challenges.
● Welding Thick Plates Defect-free
It is difficult to weld thick metal plates. This is because they require high temperatures to heat properly, along with carefully controlled processes. If you fail to do it right, there can be defects like incomplete fusion or porosity. These defects are almost invisible, making it difficult to identify. However, they do pose great risks for the weld strength.
● Distortion and Warping

Heat from welding shells can result in bending and twisting of the shells. This is referred to as distortion. It can affect the assembly of other components because it can cause misalignment. You need to prevent this in order to avoid extra time, effort, and costs.
● Ensuring Weld Quality Under Pressure Specifications
Heat exchangers operate under high pressure, and as such, every weld must be consistent and of high quality. Even the slightest weakness can cause your weld to fail. This is why you must be extremely careful and follow strict guidelines.
● Preventing Cracks (Depending On the Materials Used)
There are some materials that are more sensitive. If they are not managed properly, they may break during or after the welding process. In these cases, you must preheat properly, control the cooling, and ensure appropriate filler material.
● Working Within Strict Codes and Inspections
The work must be according to the requirements of codes and inspections. This is not flexible work. There are strict industry codes that need to be adhered to. This is because inspections are thorough. Welds are often tested by methods such as radiography or ultrasonic testing. If something fails, it needs to be reworked.
All of these challenges translate to one thing: the importance of precision. It is not optional to have skilled welders, meticulous planning, and rigorous quality control. These are essential; you must keep in mind.
Shell Welding Process in Heat Exchanger Manufacturing
Welding is the middle step of the entire process of building the shell structure. All of the preceding steps are connected to the process of welding. Most importantly, this step strengthens, seals, and readies the structure to be put to actual use.
Where Welding Fits in the Workflow
In the heat exchanger fabrication process, there is
- Plate rolling
- Shell forming
- Welding
- Testing
To begin with, some flat metal sheets are rolled into a cylindrical shape. This is the most basic form of the shell. Next, you align the rolled pieces of metal properly. After that, you can perform the welding process to finish the assembly of the shell.
The final shell can then be taken to the testing phase. Here, you subject it to pressure and temperature, and operational conditions, to test how it performs.
Longitudinal vs Circumferential Welds
In the manufacturing of the shell, there are primarily two types of welded joints.
- Longitudinal welds: These are where welds are located along the length of the shell and join the edges of a single rolled plate.
- Circumferential welds: These wraps of the shell are done in a manner that joins different segments of the shell or rings together.
To ensure the strength and safety of all the parts of the unit, it is important that you align, fit, and weld all the components with care.
Multi-Pass Welding for Thickness
Heat exchangers have thick shells. Hence, they require you to use multi-pass welding. This can be done as follows:
- The welding joint is filled one layer at a time.
- Each layer contributes to the joint’s overall strength.
- Heat is distributed in a more controlled manner.
- Welds are more durable due to the minimized risk of defects.
You can find multi-pass welding to be more time-consuming and skill-demanding. However, this technique allows you to have stronger and more reliable welds.
Post-Weld Heat Treatment (PWHT)

The welding process doesn’t finish when you stop the arc. The weld still has internal stresses packed in the metal. This is where PWHT is beneficial:
- Welded joints’ internal stresses are released.
- The risk of cracking is less.
- It increases the toughness and performance over a longer period.
- It makes your work compliant with the required codes and standards.
A shell may look fine on the exterior without PWHT, but it will eventually fail due to pressure after a period of time.
Conclusion
Heat exchanger shell welding is entirely dependent on your planning, precision, and discipline. You are not just fusing metal together. You are constructing something that must withstand heat, pressure, and the test of time. Every aspect, from selecting the best welding technique to heat control and WPS adherence, is important.
Shortcuts and rushed work can lead to unsafe and expensive defects. On the other hand, consistent, skilled work paired with proper inspection can lead to reliable, long-lasting welding. The principle is simple: Get it right the first time. Always remember to prioritise safety and adherence to welding codes over speed and time efficiency.
Frequently Asked Questions
1- What is the best welding method for thick heat exchanger shells?
You’ll usually rely on Submerged Arc Welding (SAW) for thick shells because you get deep penetration, strong welds, and high productivity. You may also combine it with GTAW for root passes.
2- Why is distortion such a big issue in shell welding?
You deal with high heat input, so metal expands and contracts unevenly. If you don’t control it, you’ll see warping, misalignment, and residual stresses that can affect fit-up and performance.
3- Do all shells require post-weld heat treatment?
No, it is based on the material, thickness, and code requirements. Many carbon and alloy steel cases will require post-weld heat treatment to relieve stresses and improve toughness, but not all.
4- How do you ensure weld quality in pressure vessels?
This is done by adhering to qualified WPS, employing competent welders, and conducting inspections by radiography or ultrasonically. The variables are also recorded and maintained to result in a uniform, strong weld that meets code.
5- What are the certification requirements for welders?
Most likely, you will need to have a certification. This will vary based on the job and where it is located. These help qualify you for certain processes, positions, and materials to weld on any critical pieces.
Recommend Reading:
The MIG vs TIG Welding: The Ultimate FAQ Guide
GMAW vs FCAW – What is The Main Difference Between Both
Overlay Welding – Techniques, Applications, & Best Practices


 EN
 ES
 RU
 JA
 FR
 PT